Uploading Documents
After the Document Library has been configured with the appropriate folders, documents are ready for upload. To access the Document Library in order to upload a document, navigate to the Documents section within the Company tab and then select the blue "Upload Document" button.

The system will then prompt for the upload of the document file, which can be handled two different ways. There is the ability to drop and drag the document file into the grid, or the file can be manually selected by clicking the button that says "Select file". Once the file is selected, be sure to click "Save" to continue.

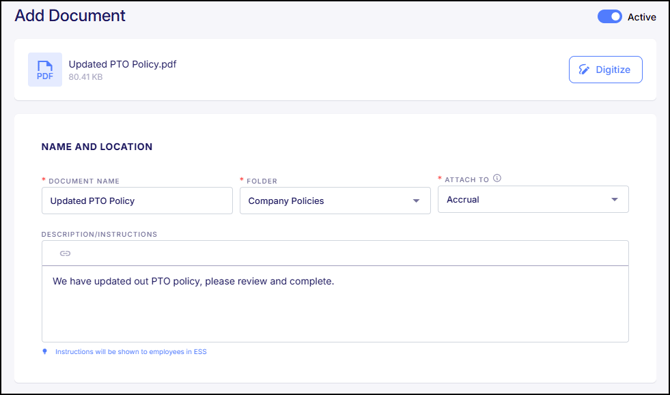
After selecting the document file to upload, the following fields will be prompted:
- Document Name - This will automatically populate with the name of the file that was selected. There is the ability however, to modify the Document Name, which will be what shows as the name within the Document Library when referencing the document.
- Folder - Assign the document to the appropriate folder. This is why adding folders is the first step toward building out the Document Library.
- Attach To- This establishes which "Card" within the employee profile the document will be attached to after it has been sent and completed by an employee.
- Description/Instructions - If applicable, provide a description on what the document entails and any appropriate instructions for the employee. Anything entered in the Description/Instructions box will be included with the document when it is sent to employees. There is the option to embed a URL within the Description, if desired.
- Digitize - If enrolled in Empeon's HR Premium Package, there is the ability to digitize this document to include fields of information to be entered on the document. Digitizing documents will enable employees to enter information on the document upon receipt. More information on how to digitize the document is available in the next section of this article.
After all fields have been attended to, click the "Save" button to upload the document to the Document Library. Please note that only important, company-related documents need to be uploaded to the Document Library. Documents such as W-4, I-9 and direct deposit forms do not need to be uploaded as they are available in other areas of the system.
Digitizing Documents
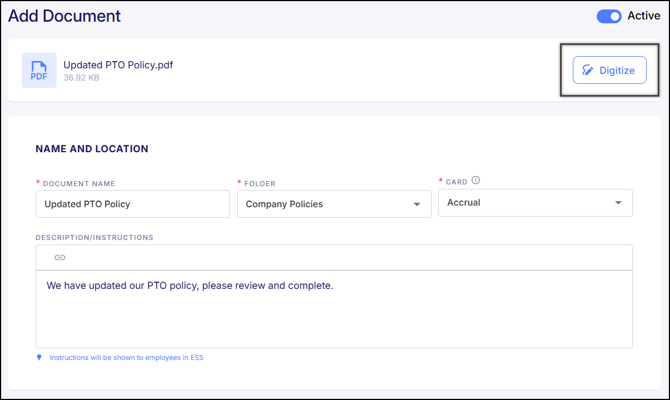
When uploading a document that needs to be filled out by individuals within the organization, it must be digitized. Digitizing the document allows for the inclusion of required fields, enabling individuals to enter their information directly onto the form. Digitizing Documents is a feature only available to organizations subscribed to the HR Premium package.
To digitize the document, click the button that says "Digitize".
A screen will then appear to preview the document and allow for the inclusion of fields anywhere on it. Two types of fields are available for use: Auto-populated Fields and Input Fields.
Auto-populated Fields
Auto-populated Fields automatically fill with information from the employee's profile based on the field's criteria, eliminating the need for manual input. For example, the "Full Name" field will automatically populate with the recipient employee's full name.

Input Fields
Input Fields are fields that require the employee to enter the information within the field. These fields are not pre-populated and require manual entry. For example, the field "Text" will require the employee to enter a text within the field.
- Open Text Field: Allows freeform text entry.
- Number Field: Allows only numerical entry.
- Long Text: This field can be expanded both vertically and horizontally to encompass a wide area on the document to enter text. This field should be used if the text that should be entered is longer than a couple words.
- Date Field: Allows entry of any date, not just the current date. An auto-populated field for the Current Date is available if the document requires the current date to be entered automatically.
- Dropdown Field: Allows recipients to select from a predefined list of options.
- Checkboxes Field: Allows recipients to select multiple options from a list.
- Radio Buttons Field: Allows recipients to select only one option from a list.
- Signature: Facilitates the collection of an electronic signature.

Adding a Field
To include a Field on the document, simply click on the desired field, then drag and drop it to the location on the document where it should be displayed. After placing the field on the document, the location of the field can be adjusted if needed, in case it was initially dragged it to the wrong area. The field can also be expanded horizontally to encompass a larger area for the field as well. To remove the field once it is on the document, right-click on it and select "Delete".
For each Input Field, there is the ability to specify whether it should be completed by the "Employee" or the "Employer" by clicking on the field once it has been correctly positioned. Additionally, there is the option to designate the field as "Required", ensuring that all necessary information is captured and not overlooked.

Customize your Signing Order
When both the Employee and the Employer are required to input information on the document, the signing order can be customized. This specifies which party needs to sign the document first and which party needs to sign it second. To do this, add the field again and designate it for the other party to sign. A menu in the lower right will appear, allowing for the customization of the signing order. To set the order, click on either "Employee" or "Employer," hold down the mouse, and drag to arrange the signing sequence. This flexibility ensures a seamless and efficient document completion process.

Finalizing the Digitized Document Upload
Once all necessary fields have been added to the document, use the Preview button at the top of the screen to see how the document will appear with the entered fields. If everything appears satisfactory, close the Preview Screen and click the blue "Done" button to finalize the digitization process. The screen will then return to the Add Document screen. Click "Save" to add the document to the Document Library.

Managing the Document Library
Folders within the Document Library have a three-dot menu that offers the option to "Copy to another company". This will copy the folder and all assigned documents to another company within the organization. For managing individual documents, that is handled within the folder the document is assigned.
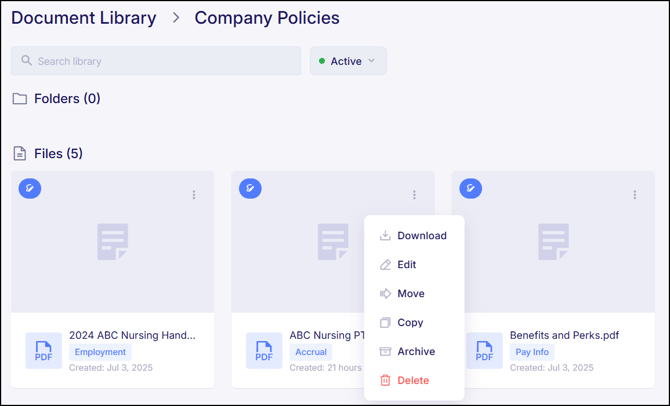
Each document has a three-dot menu that allows for the following options:
- Download - This will download the document to your computer.
- Edit - This allows for edits to be made to the document.
- Move - This offers the ability to move the document to a different folder within the Document Library.
- Copy - This offers the ability to copy the document to a different company within the organization.
- Archive - This will "archive" the document, essentially making it not active. Archived documents will still be saved within the Document Library, they just won't be available as an document that can be sent to employees.
- Delete - This will delete the document from the Document Library.
 - This icon indicates that the document has been digitized.
Related Help Center Articles
When a document is successfully uploaded to the Document Library, it becomes available to be sent employees. However, the transmission method for sending the document depends on the recipient. For new employees undergoing onboarding, documents should be included within the Onboarding Template, or within a Path that is embedded within the Onboarding Template.
For employees who are already onboarded, documents can be sent individually, or collectively to a group of employees. For more information on how to send documents to active employees, please refer to Empeon's articles: